


Graduation Card Tutorial
I was commissioned to create a graduation card and couldn’t find one I loved, so I gathered elements I liked from a bunch of different sources and created my own! Learn how I did it so you can too!
Original Post May 2018


Hi Everyone!
I hope you are all having a good weekend :)
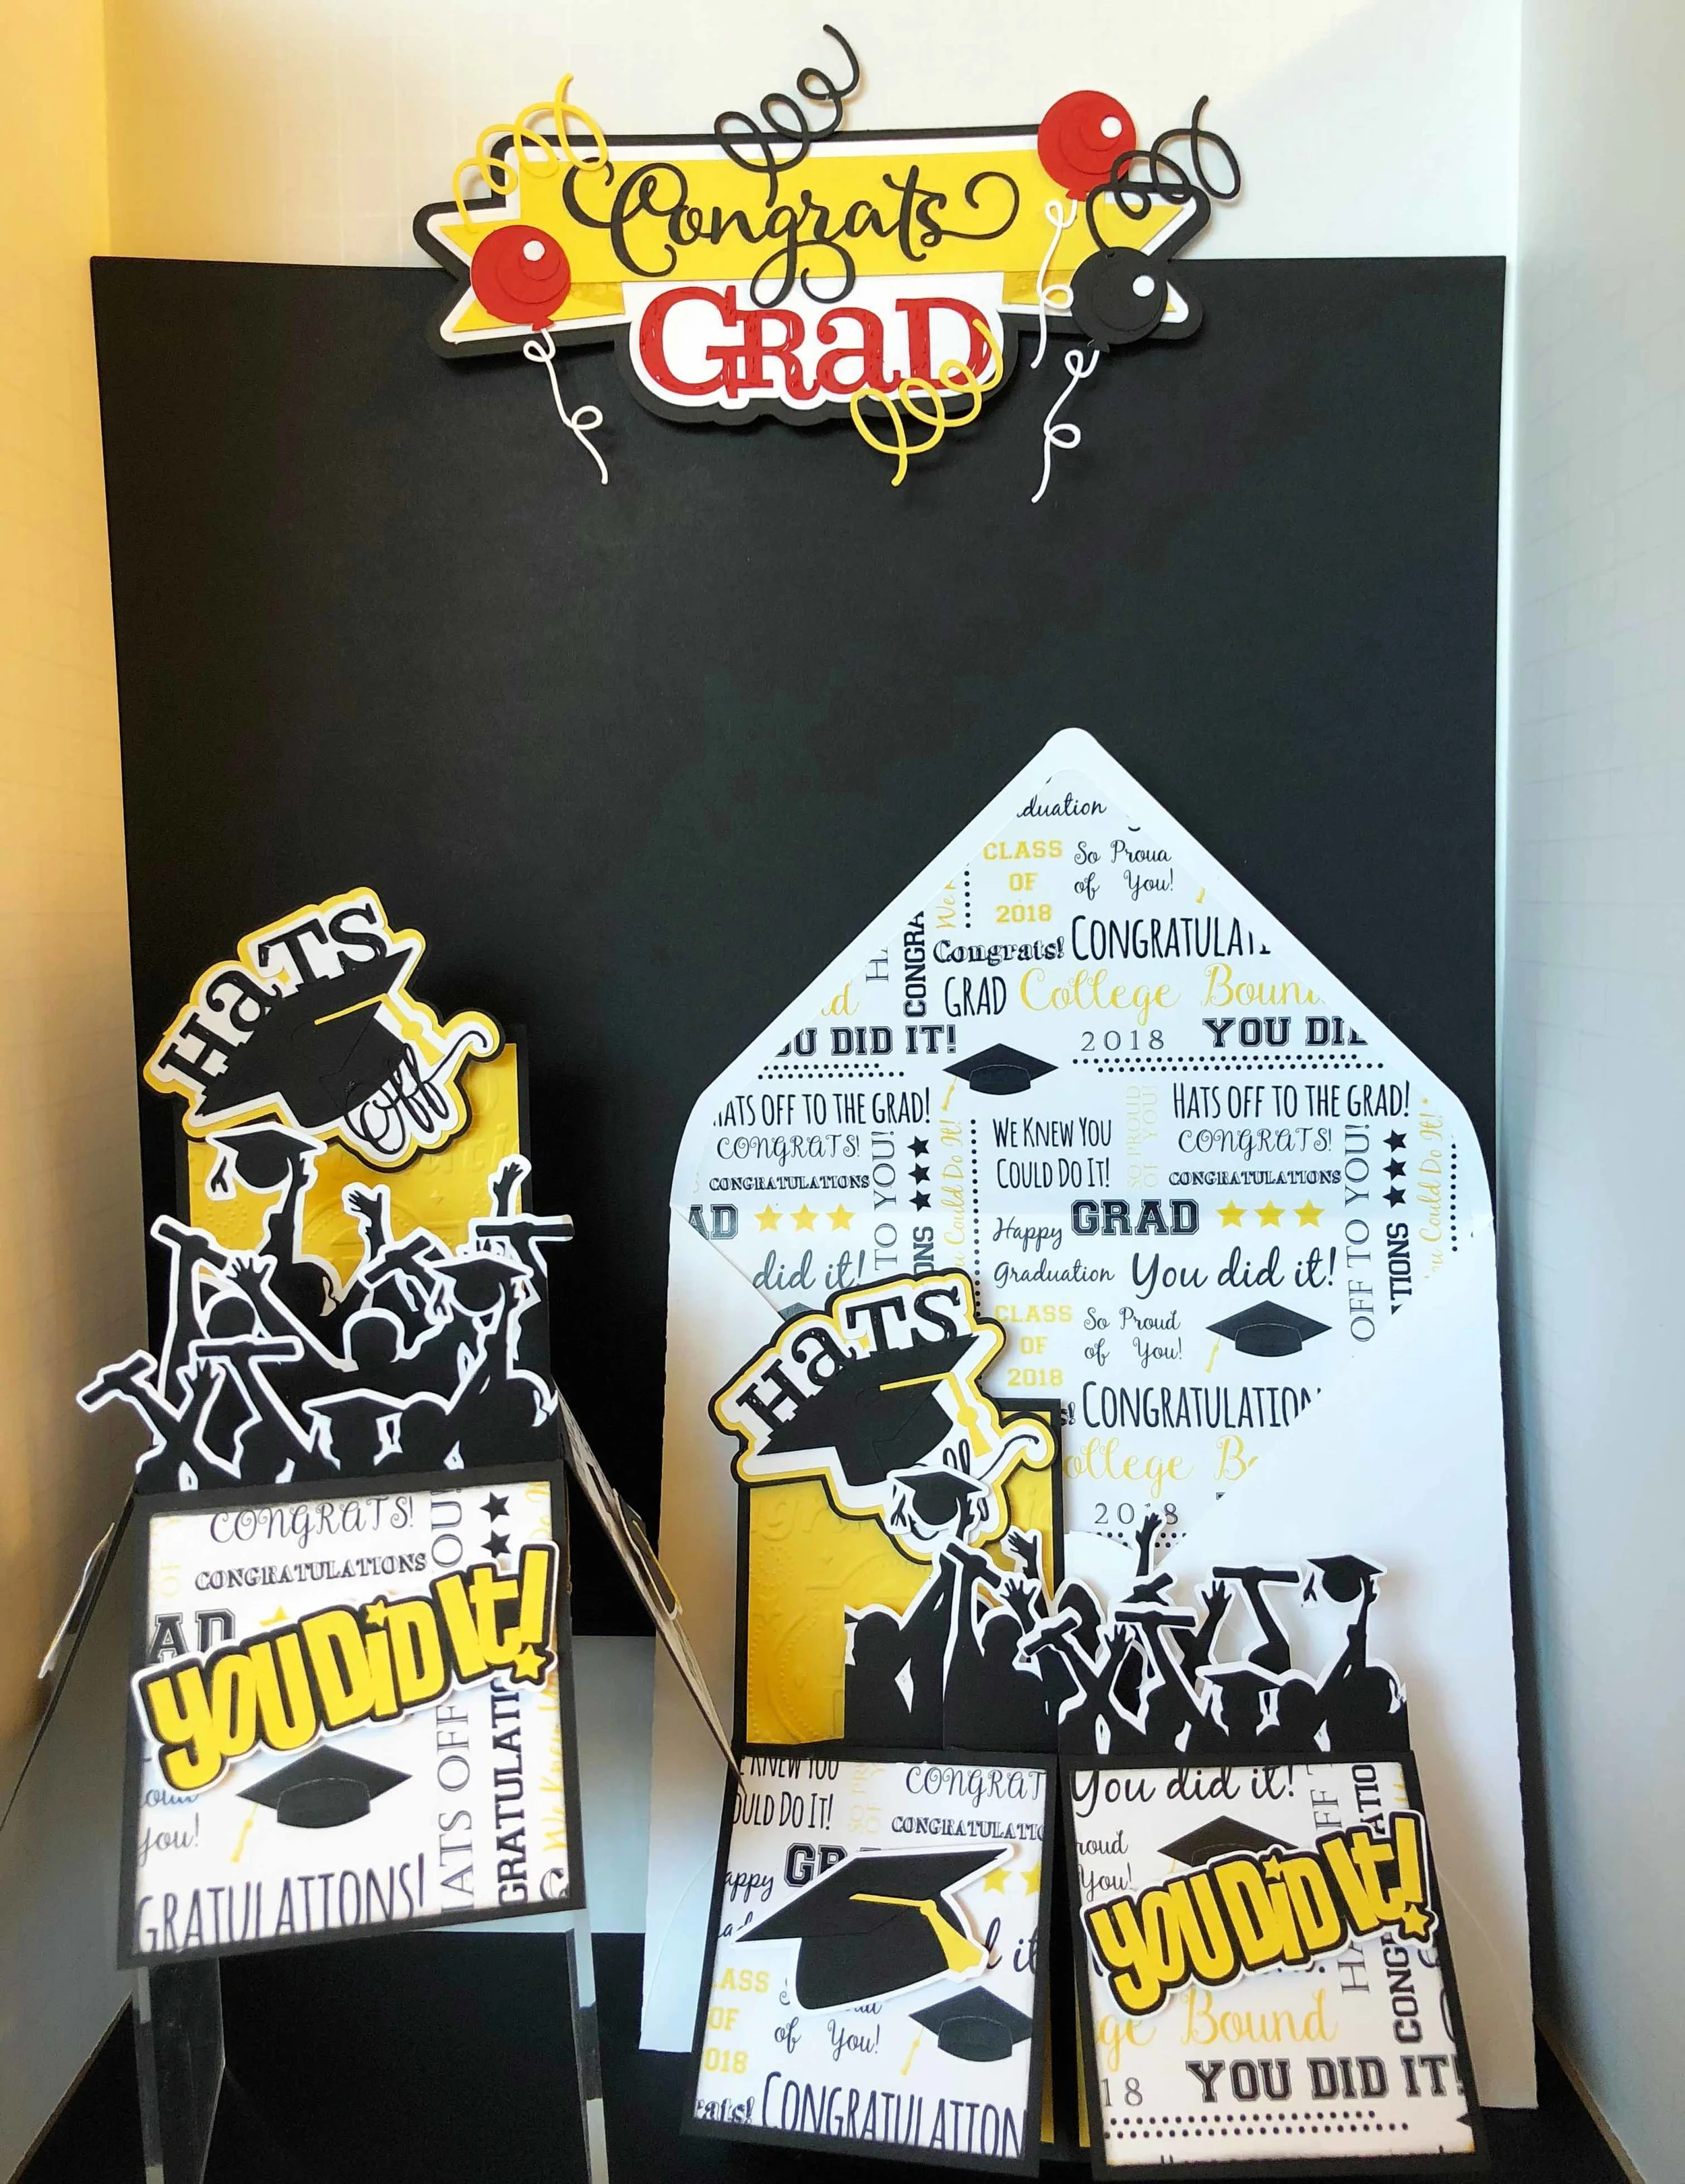
I am finally getting to this tutorial for a Graduation greeting card I meant to post last week but the time totally got away from me! So here goes!
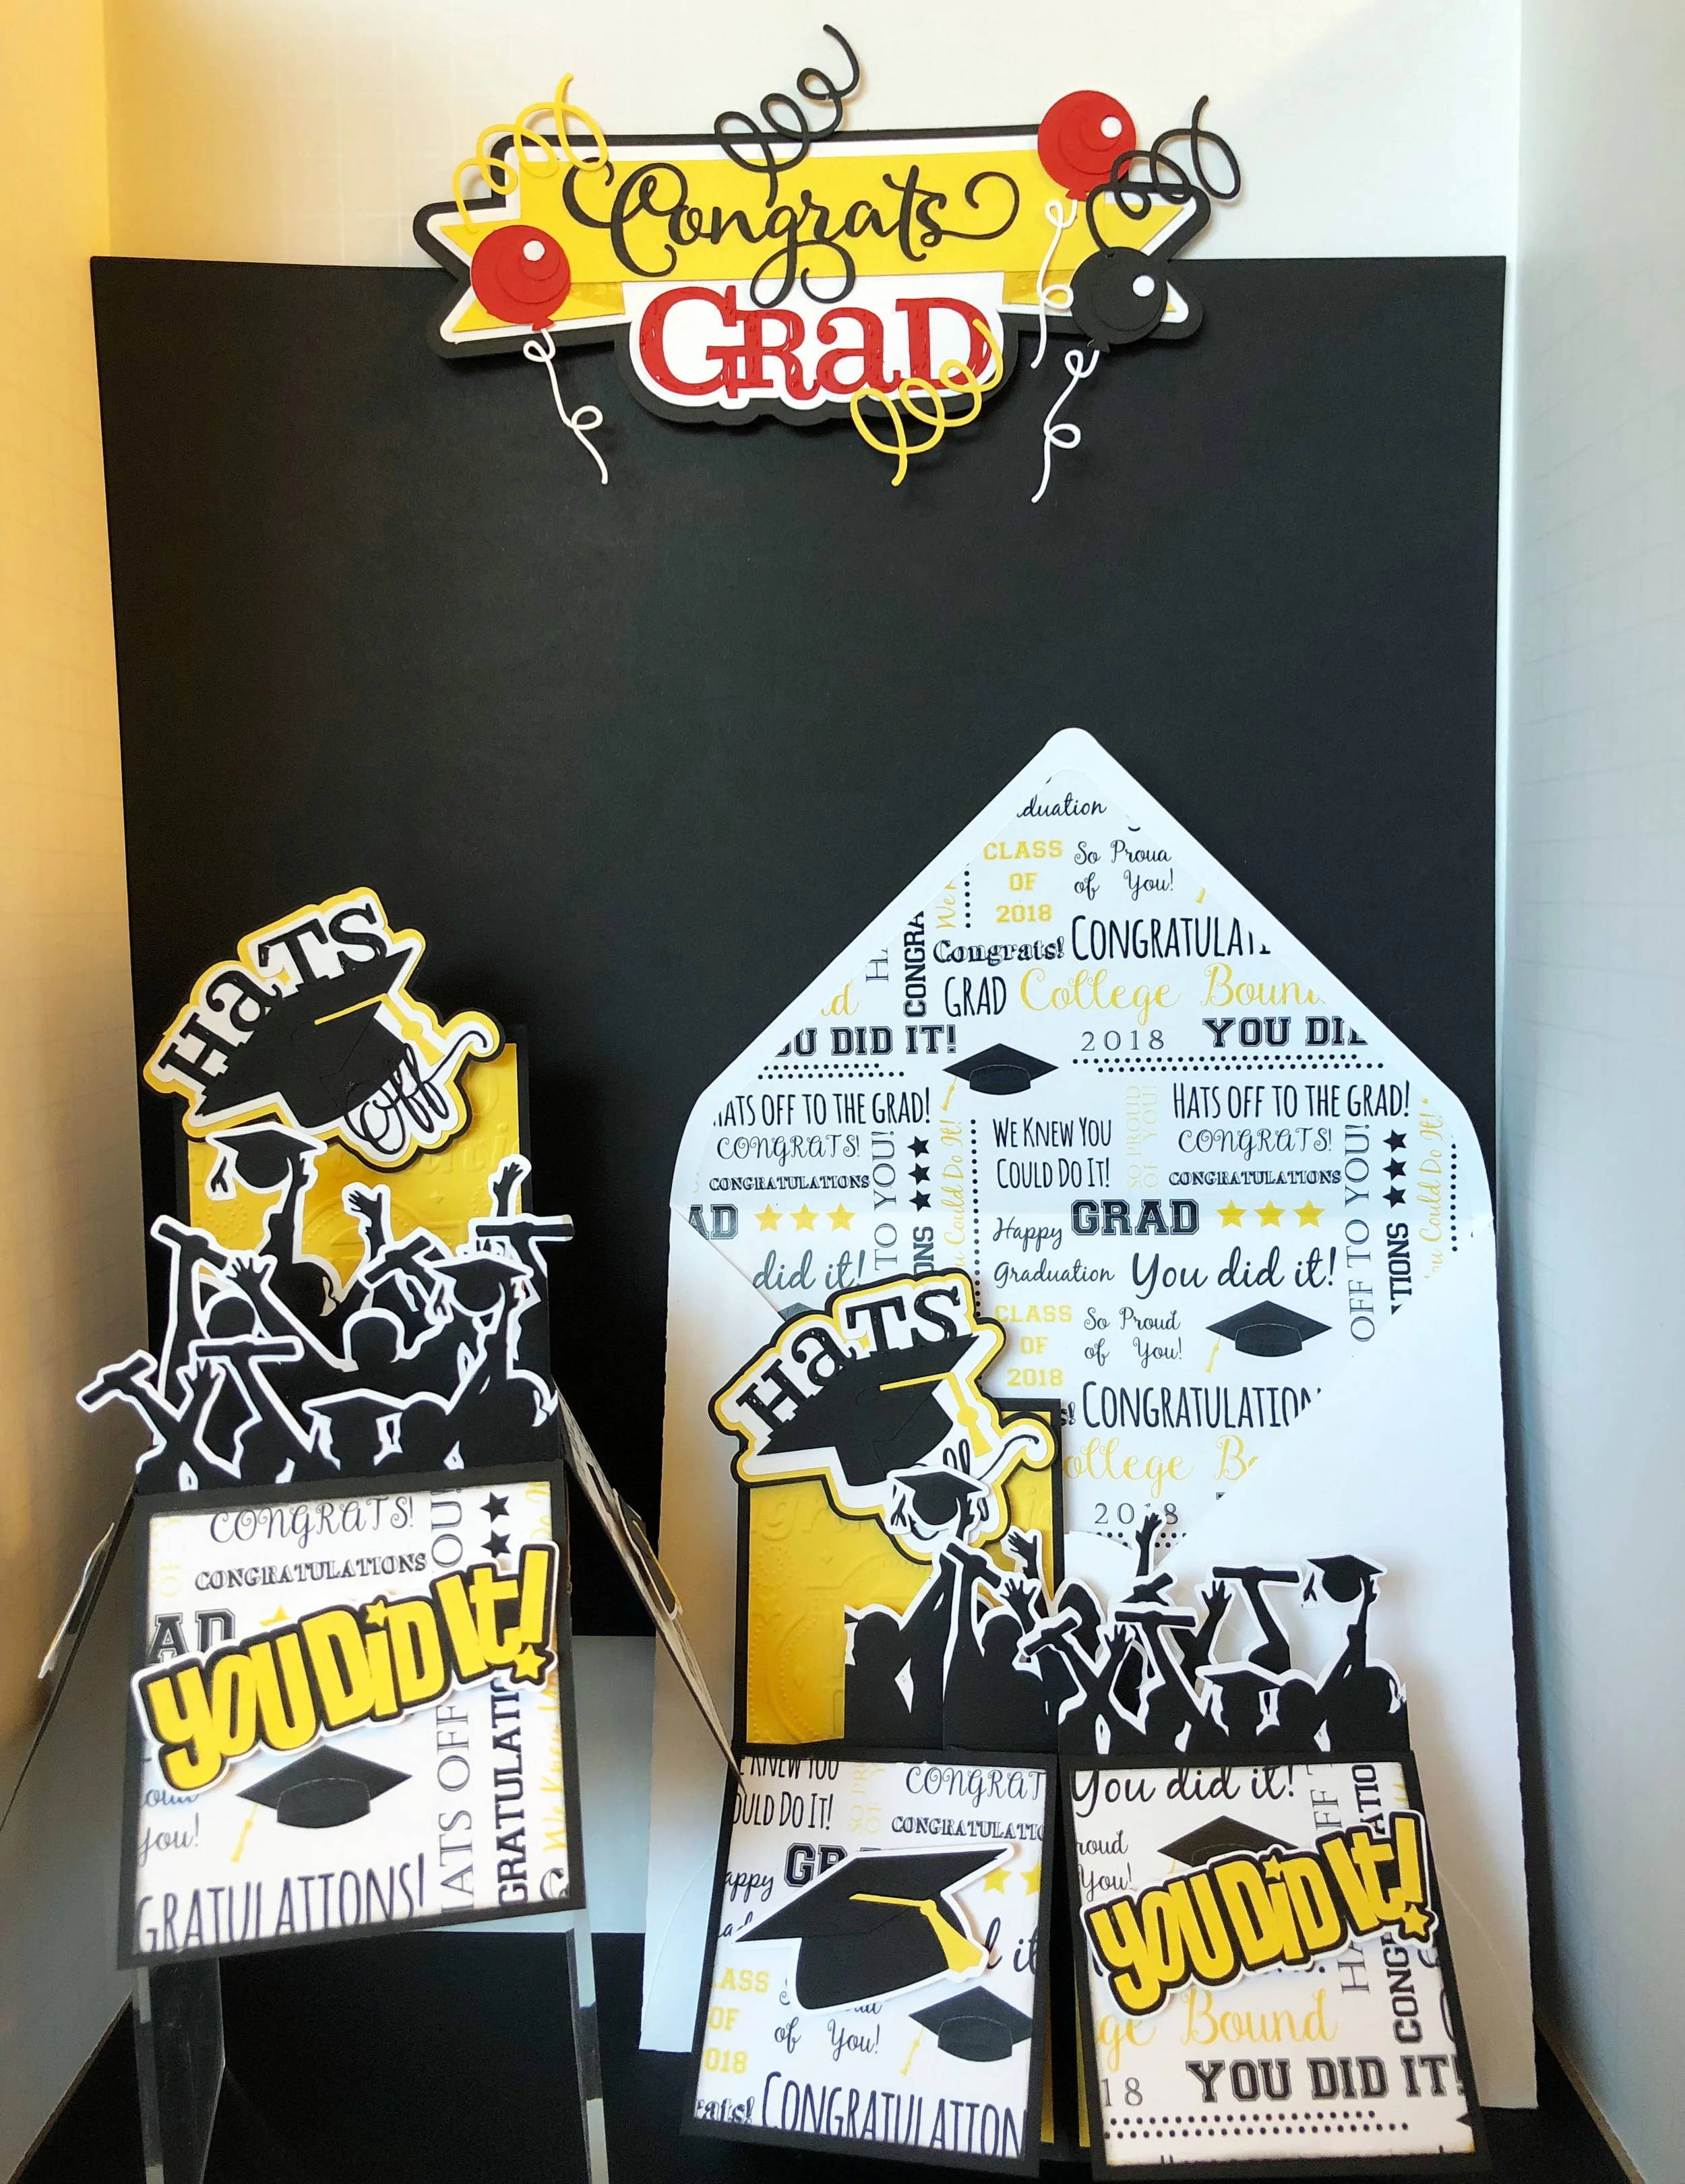
First, before I forget, here are the products I used:
Plain Box Card - from SVGCuts.com. It was included as an extra in a kit but I can't find which one - my apologies! I will contact her and get back to you.
Graduation paper - I purchased this really cute paper pack on Etsy from HuckleberryHearts.
Graduation Elements - I purchased from misskatecuttables.com
Extras: Zots 3D Adhesive Dots, Scotch Tacky Glue, ColorBox Pigment Ink, Darice Graduation Embossing Folder
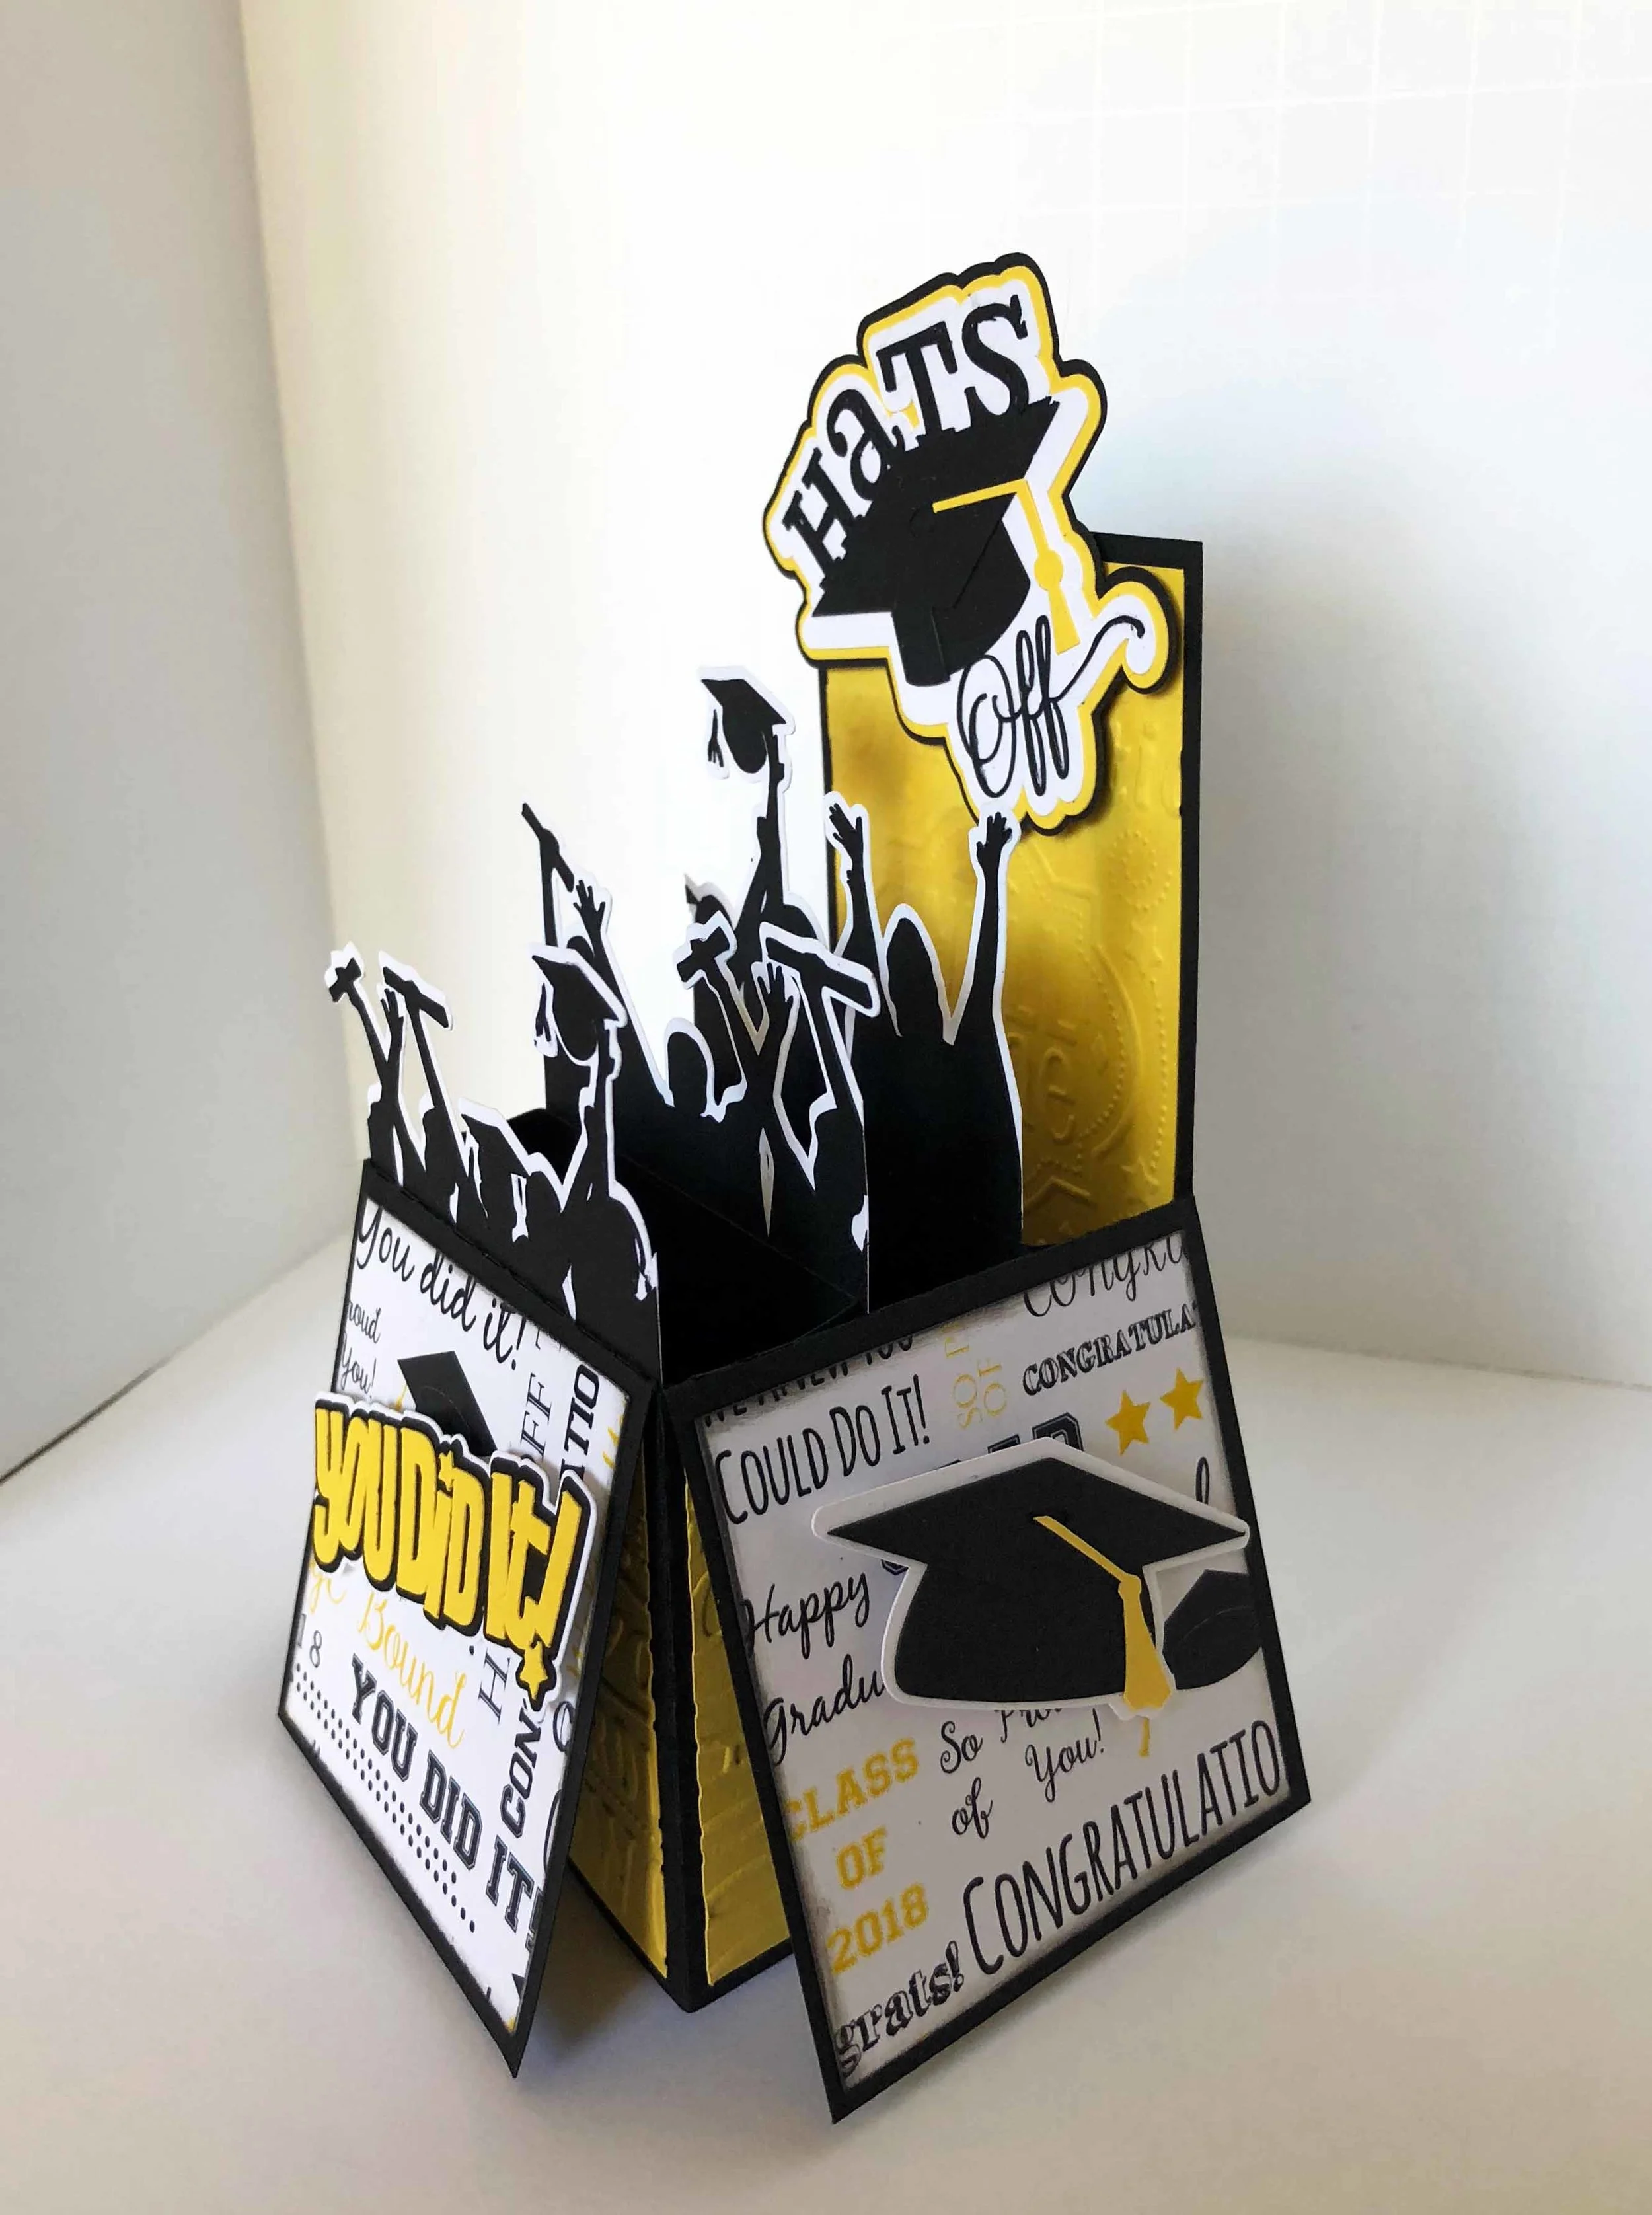
This tutorial also assumes you know the basics for constructing a box card so I won't go into details here. You can find great instructions on SVGCuts.com.
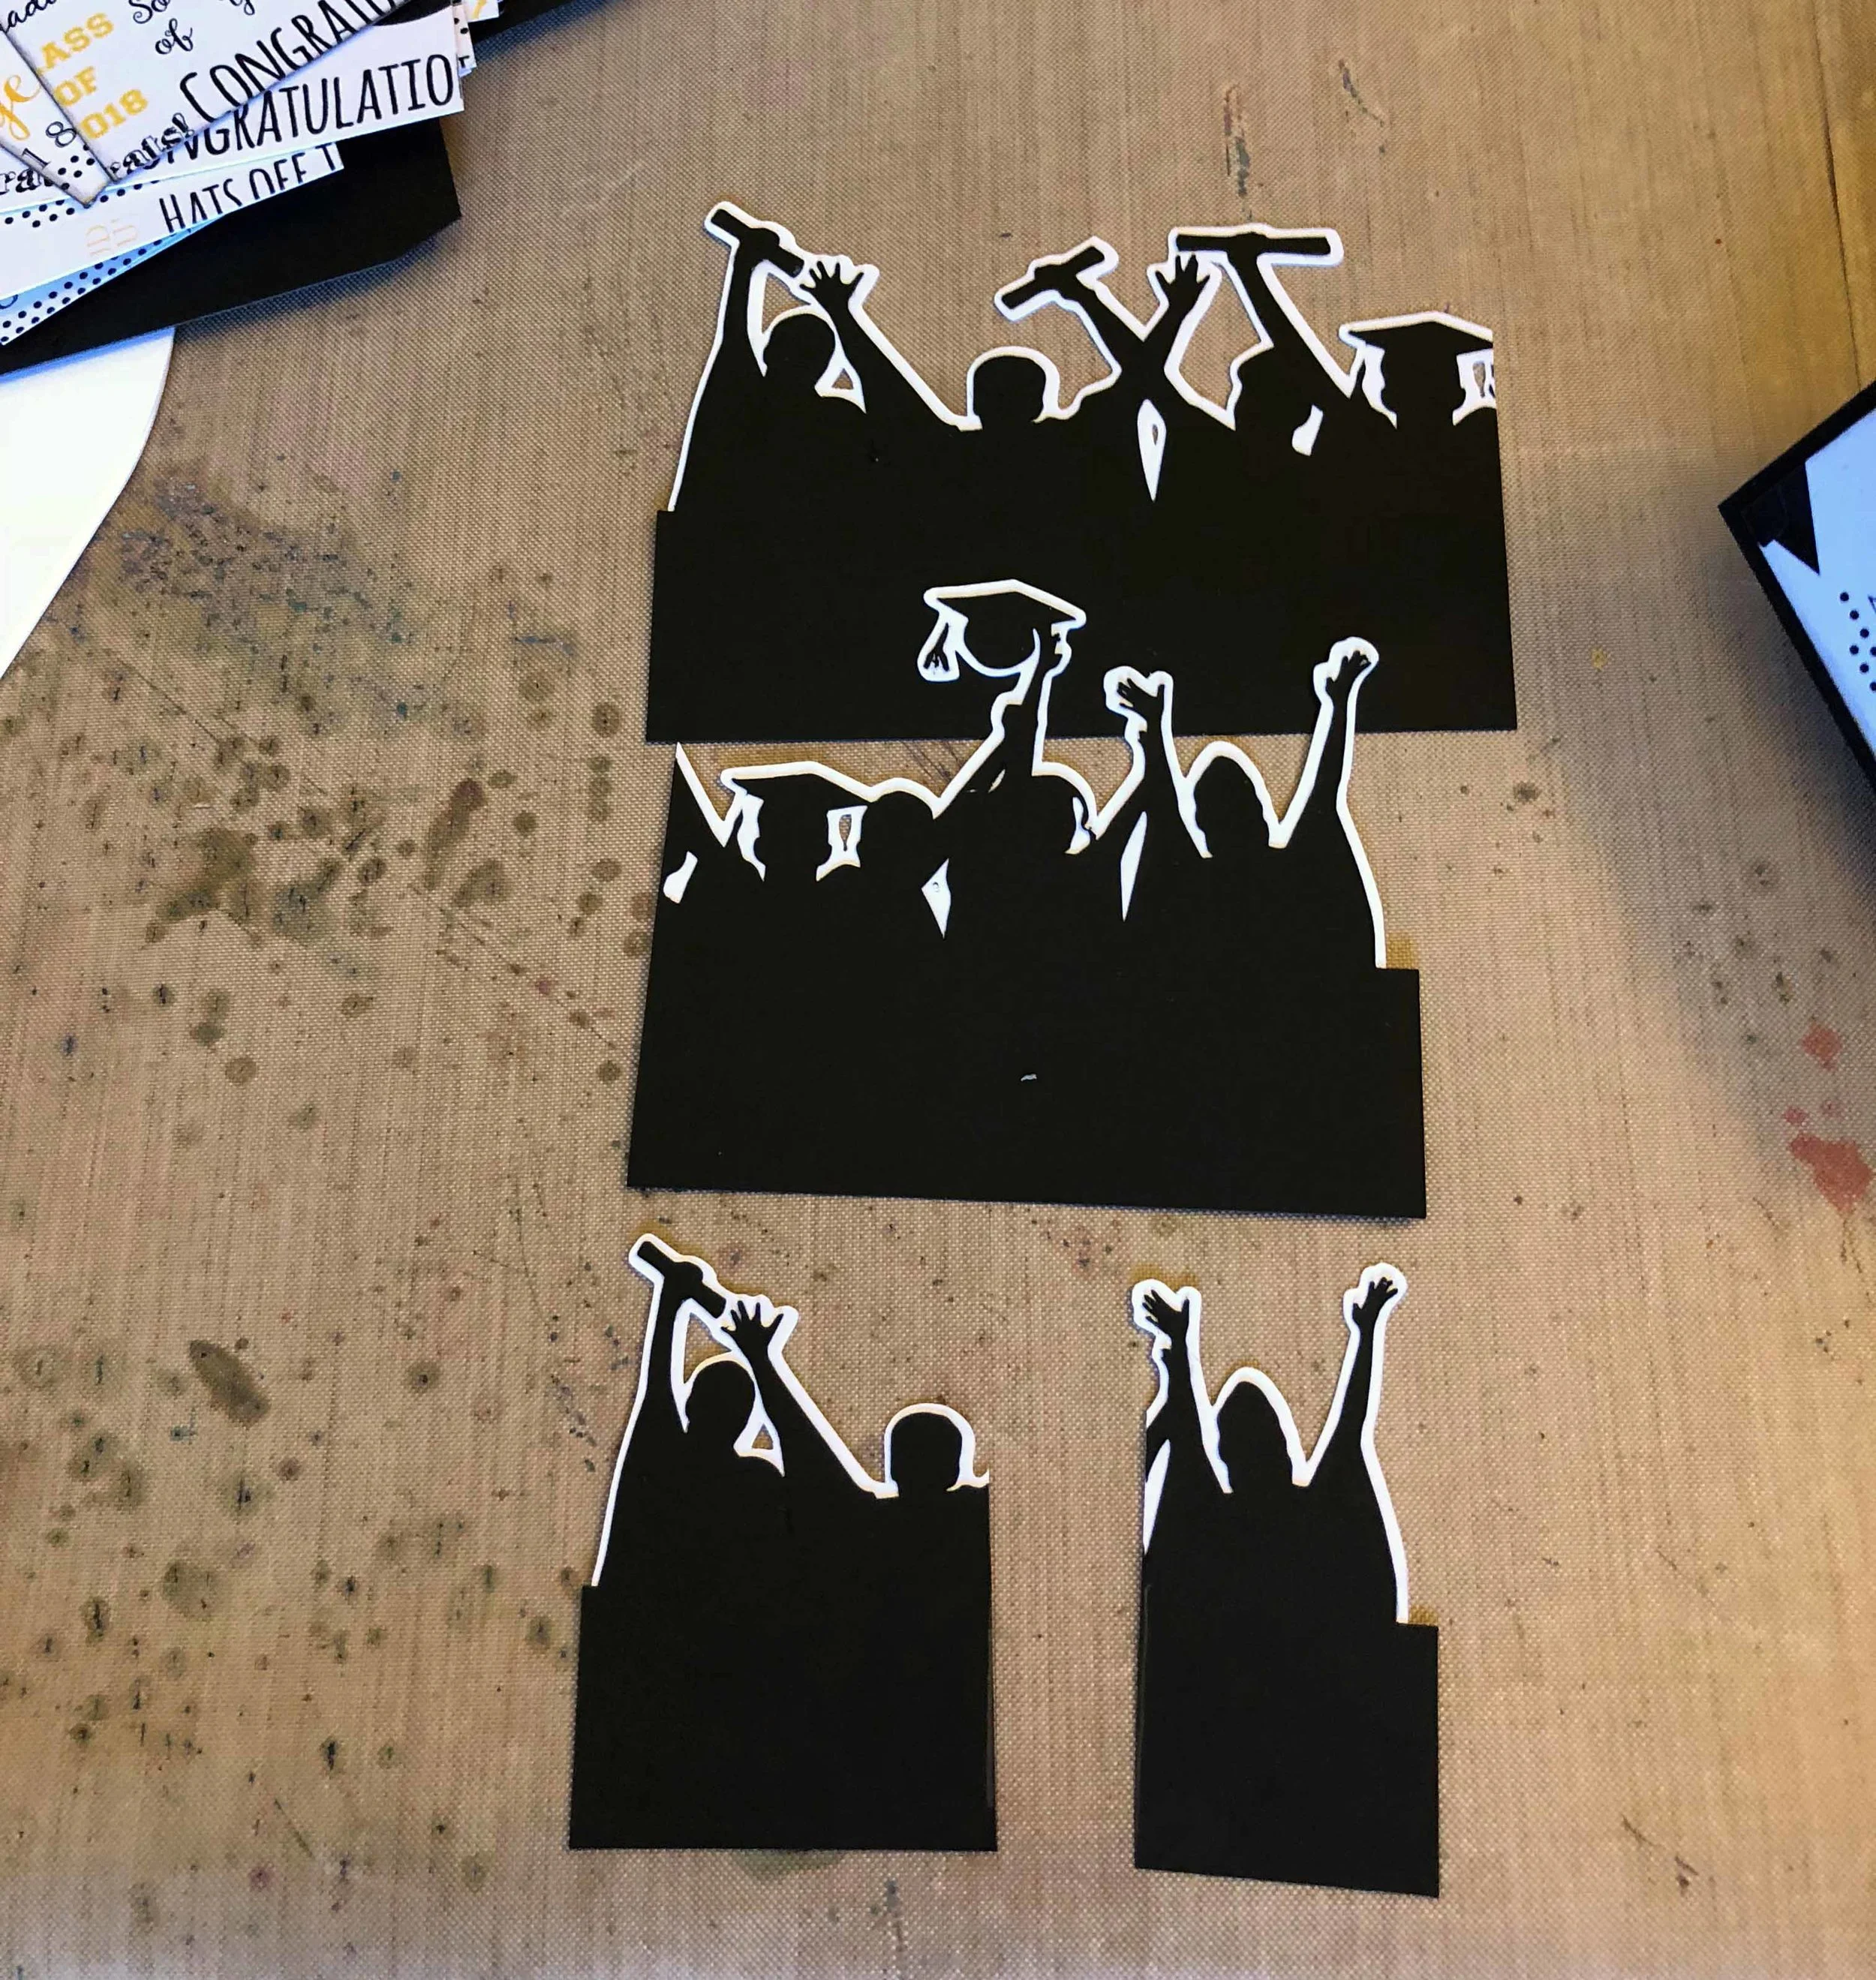
The first thing I wanted to do was create the crowd so I cut out the basic crowd graphic on black cardstock. (You can find this image all over the internet if you Google it.) I cut the original image out in it's entirety and then just decided which part I wanted to choose for each layer and cut it down to size. More on that below.
But when I put the three layers in the card it really just looked like a black blob and you could not see the details. So I wanted to try a white shadow layer. I found several YouTube videos by Wendy Edwards which I found to be super helpful and simple to follow like this one on creating a shadow layer behind an image. So, I followed the instructions and I'm super happy how it turned out. I'll post my edited svg cutting files below if you want to try it.

I made three sizes so the crowd would be sort of like stadium seating levels. The first layer is at 100%, the second layer at %110 and the third at %120. So I did the same thing with the shadow layer and this is how it looks.

Next, I decided to use the center of the smallest image for the front of the card.

For the next two layers I repeated this process, making sure I didn't choose the same part of the crowd for two consecutive layers. And I saved the scraps to use on another project or another card even. I hope this makes sense! Here is a pic of the scraps.
I embossed gold paper with Darice's graduation embossing folder for the inside panels. It's hard to see in this pic but it's a really cool design.

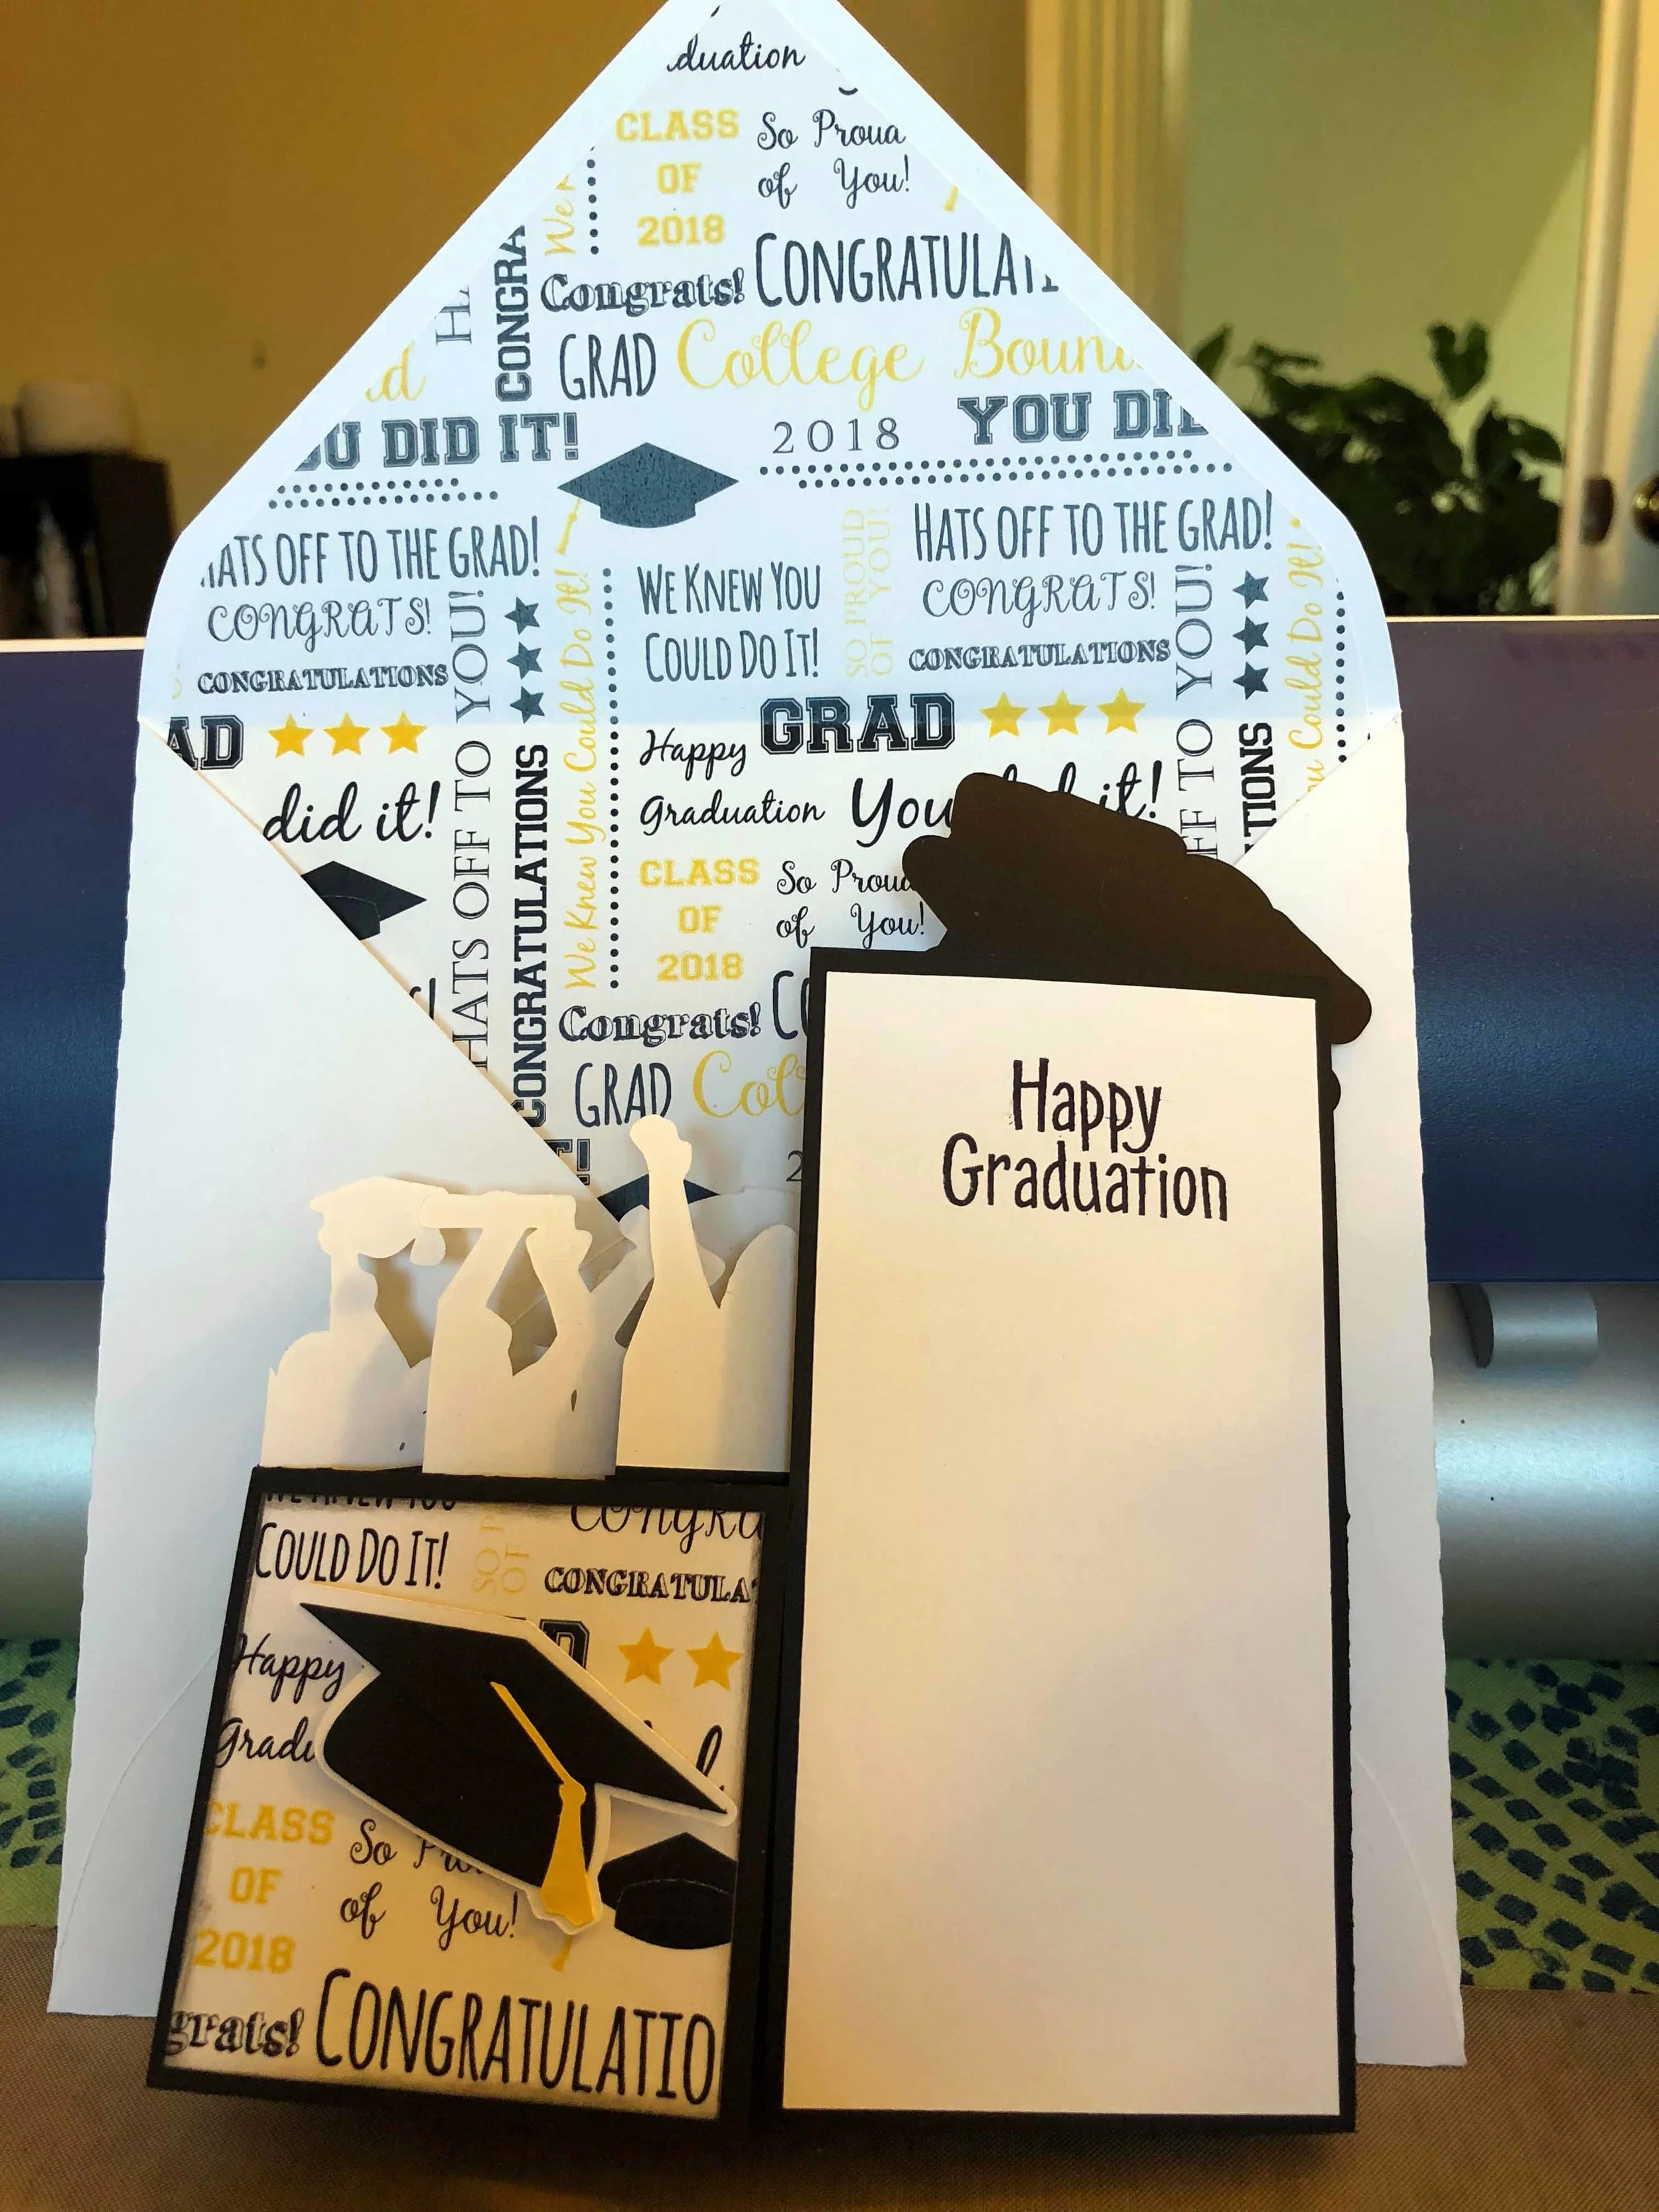
And used the cute graduation digital paper for the exterior panels.
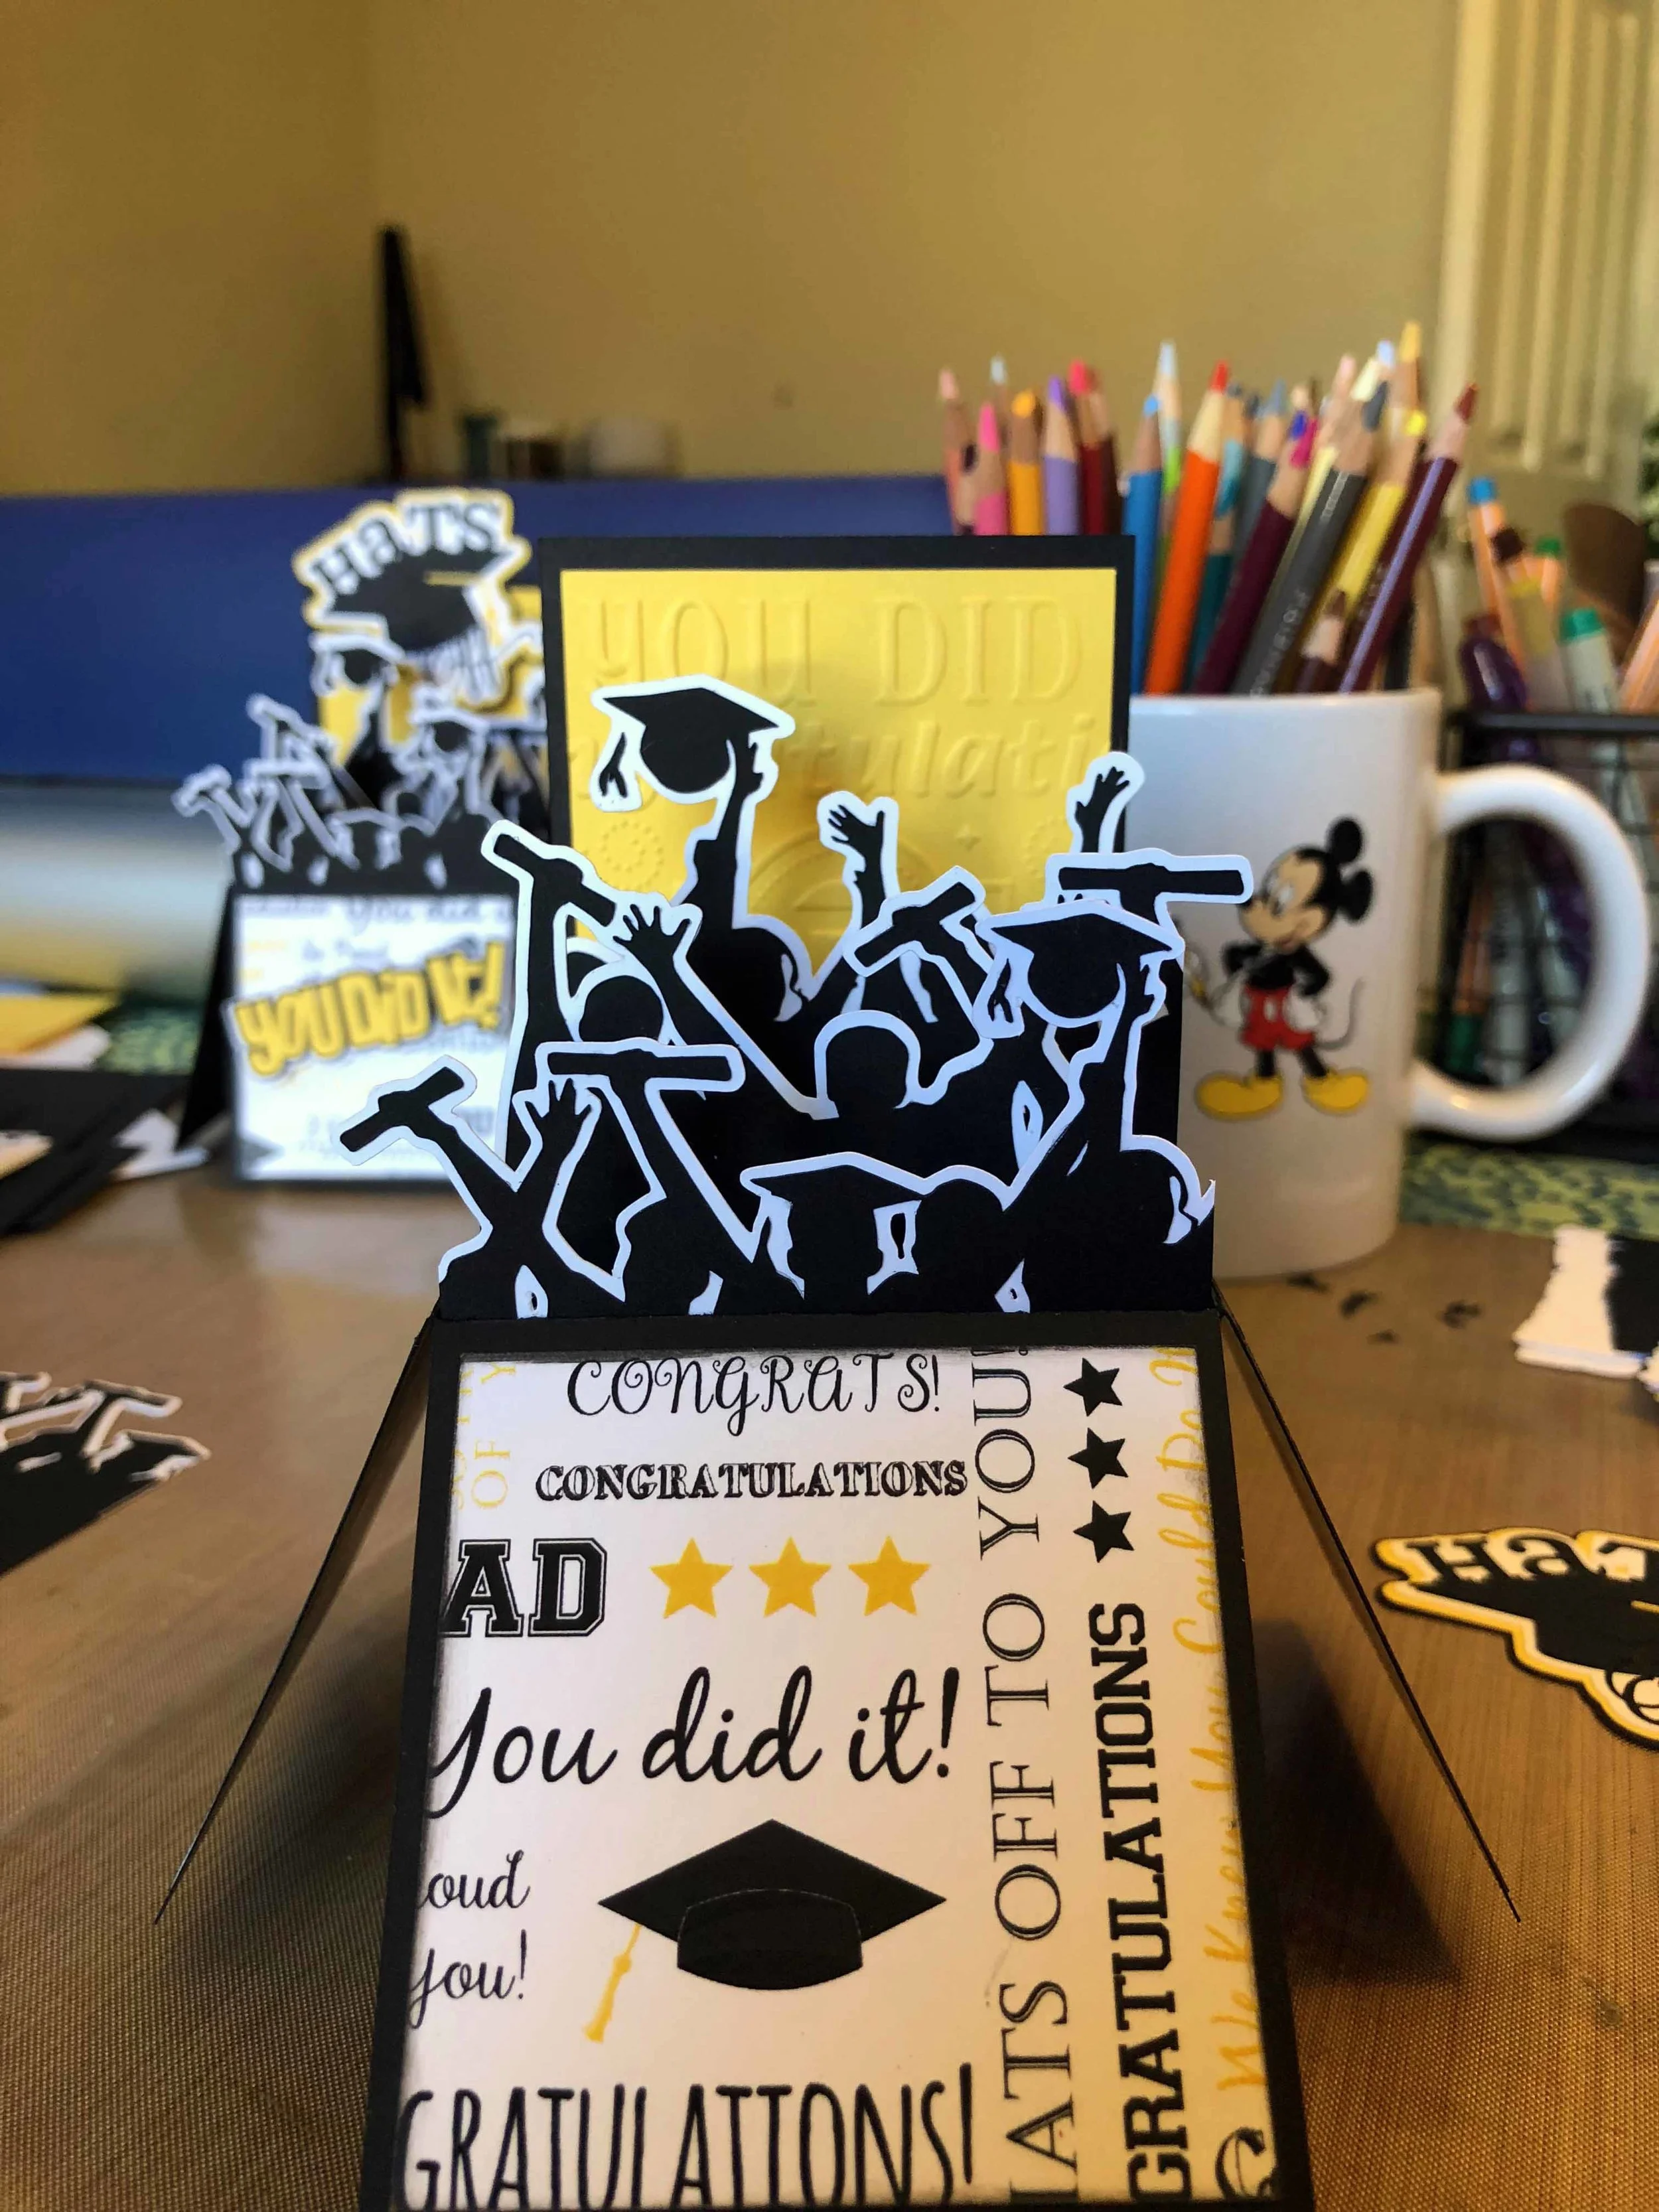
Then I added the "Hats Off", "You Did It", and individual hats I purchased from misskatecuttables.com.

For the back, I just stamped "Happy Graduation" from an old stamp. I don't know what brand it is.
And that's pretty much it! I hope you have enjoyed this as much as I have! Please let me know if you have any questions:)
Laurie :)
You can download the files here:
(contact me if you have any trouble with the files)
coming soon….


Making fun stripes on the gel plate!